

Small, hidden plumbing leaks can warp floors, stain ceilings, drive up water bills, and invite mold before you ever see a puddle. This guide explains how to find a water leak in your house quickly and safely—starting with a meter check, then moving through practical, low-risk tests to narrow the source. A water leak is any unintended flow from supply or drain lines, and the steps below help you confirm a problem, contain damage, and isolate the origin without tearing open finished walls.
Key Takeaways
- Start safe and simple: confirm flow with the water meter when all fixtures are off, then shut the main if needed.
- Read the clues: damp stains, warped trim, and musty odors narrow the search indoors and outside.
- Use basic tools first: towels, dye, a flashlight, and a moisture meter go a long way before pro instruments are needed.
- Isolate methodically: use shutoff valves and timed drain tests to separate supply from drain issues.
- Know when to call a pro: inside-wall, slab, or service-line leaks often require licensed leak detection and targeted repairs by El Dorado Hills Plumbing.
Table of Contents
- The Fast Answer: Confirm a Leak Safely and Stop the Damage
- Spot the Clues: Interior and Exterior Signs of a Water Leak
- Tools That Help: Simple Gear vs. Pro Instruments
- Step-by-Step Hunt: Track the Source Without Tearing Walls
- Hidden and Hard-to-Reach Leaks: Walls, Ceilings, Slabs, and Crawlspaces
- Found It—Now What? Mitigation, Drying, and When to Call a Pro
- Prevent the Next Leak: Maintenance, Pressure Control, and Smart Monitoring
1. The Fast Answer: Confirm a Leak Safely and Stop the Damage
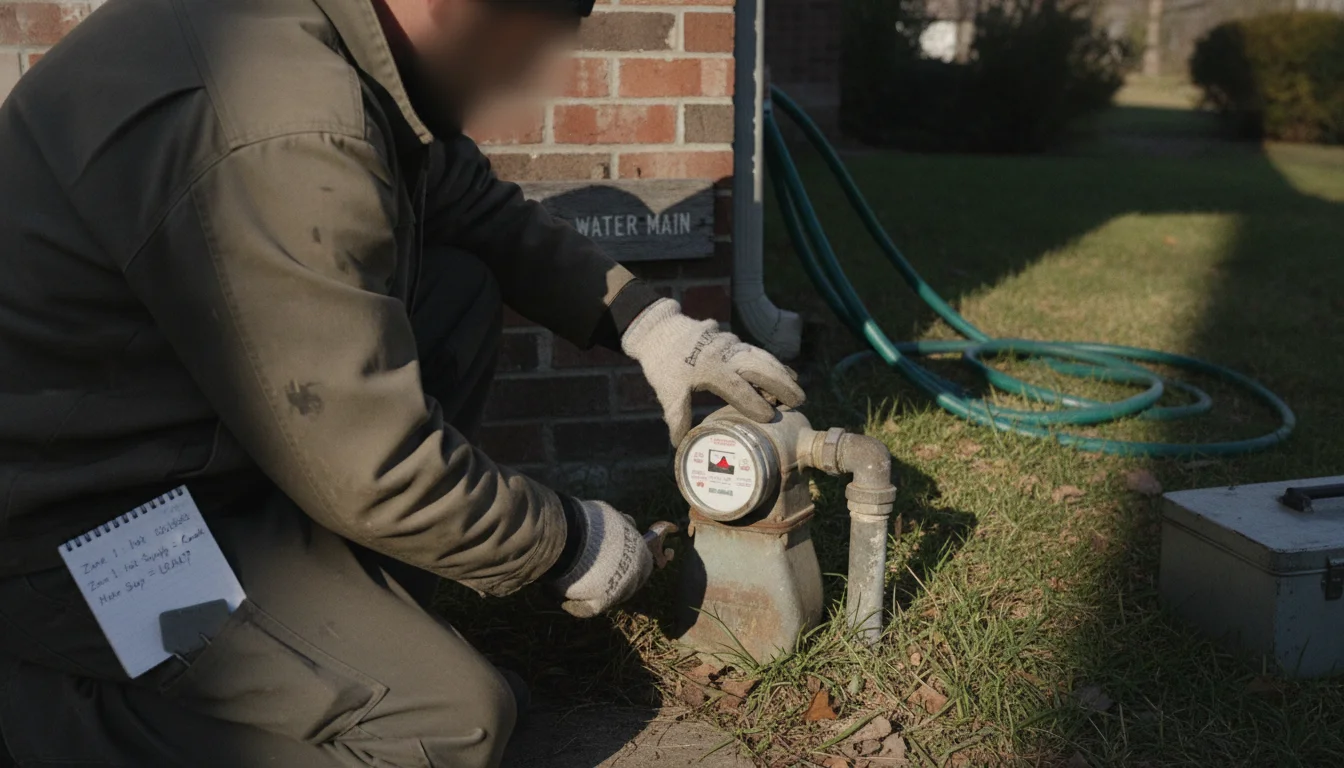
When speed matters, begin with the meter test. Your water meter tracks consumption; with every tap, fixture, and water-using appliance off (including ensuring toilets aren’t refilling), wait a minute and watch the small leak indicator on the face—often a triangle or tiny dial. If it moves when everything is off, you probably have a hidden supply-side leak.
Next, limit damage. Find the home’s main shutoff—commonly where water enters the house, in a basement, garage, or at a curb box. Turn a round handle clockwise until it stops; for a lever, rotate a quarter turn until it’s perpendicular to the pipe. If water is near outlets or the electrical panel, cut power to the affected area at the breaker before continuing—water and live electricity are a dangerous mix.
With the water off, wait about ten minutes and check the meter again. If the indicator stops, the leakage is likely on the house-side supply lines. If it still moves, the service line between the meter and the structure may be leaking. Note what you observe and take photos; clear records speed repairs by a licensed plumber. If you must keep water available for essentials, reopen the main valve partially and monitor closely. Keep towels, a bucket, and a mop nearby, slide a tray beneath active drips, and lift rugs or furniture off damp areas to slow the spread while you narrow the source.
2. Spot the Clues: Interior and Exterior Signs of a Water Leak
Leaks leave evidence. Indoors, start with rooms that regularly use water. In bathrooms, inspect for cracked caulk, spongy flooring near toilets, and stains in vanity cabinets. Run the shower and then check the ceiling of the room below. In kitchens, open the sink base and examine shutoff valves, braided supply lines, and the garbage disposal body. Wipe fittings with a dry towel and recheck—returning moisture points to seepage. In the laundry, inspect washer hoses and the standpipe or drain hose; brittle hoses or rust-stained clamps often signal slow leaks.
Basements provide clues you can see and feel. Look for damp tracks along foundation walls, white powdery deposits called efflorescence, and rust at pipe unions. If a sump pit runs during dry weather, that can hint at an indoor plumbing leak contributing groundwater. In attics, watch for dark, matted insulation or stained roof sheathing. Roof leaks can masquerade as plumbing problems—so compare stains to rain events versus clear days to tell them apart.
Outside, walk the path from the water meter to your home. A bright-green patch during a dry spell or soggy soil along the foundation can indicate a buried service-line issue. Check irrigation valves and the backflow device for hissing or persistently damp boxes. Watch the curb for continuing water flow. If your meter indicates usage when the sprinklers are off, an irrigation lateral could be leaking.
At slab edges and along foundations, distinguish normal hairline cracking from wet, musty zones. Warm spots on finished floors can signal a hot-water line leak below the slab. Note musty odors, bubbling paint, and peeling baseboards; together, these clues help you target the right area before opening anything.
3. Tools That Help: Simple Gear vs. Pro Instruments
Many leaks can be identified with simple, safe tools. A bright flashlight helps you spot a reflective sheen on fittings and valves. Dry towels or paper towels reveal weeps: place one beneath a suspect joint and recheck in an hour. Dye tabs or a few drops of food coloring help test toilets—put color in the tank and wait ten minutes without flushing; color in the bowl indicates a worn flapper. A basic moisture meter compares a suspect spot against a known-dry area to confirm elevated moisture.
Use a non-contact voltage tester before touching areas where water and wiring might meet. A small inspection mirror lets you see behind traps and angle stops. Painter’s tape plus a marker allows you to flag damp patches with times and notes, making patterns clearer. These uncomplicated tools keep your survey safe and methodical.
Pros scale up when needed. Acoustic listening uses sensitive microphones to pick up the sound signature of pressurized leaks through walls, floors, and slabs. Thermal imaging reads temperature differences; distinct cold or warm bands may trace active lines or saturated materials. Tracer gas methods fill a closed line with a light, safe gas blend; detectors then identify the escape point. These instruments trim guesswork and reduce how much finish material must be opened.
If signs are inconsistent or the exposure seems risky, consider scheduling Leak Detection Services. A licensed plumber can combine pressure testing, acoustic tools, and imaging to confirm the fault and plan a precise repair. That can save time, materials, and disruption in busy parts of a home in El Dorado Hills.
4. Step-by-Step Hunt: Track the Source Without Tearing Walls
Move from simple checks to more involved tests. Toilets are frequent culprits: add dye to the tank and wait—color in the bowl without flushing means the flapper is leaking. Listen for periodic fill-valve hissing when no one is using water. Check the base for damp rings. For faucets and showers, run water while watching under-sink traps, angle stops, and supply lines. Use a dry paper towel on joints—any darkening indicates moisture.
Look at the dishwasher and refrigerator ice-maker line. If safe, gently pull the appliance forward and inspect lines for kinks, corrosion, or dust that’s clumped from repeated wetting. Check the water heater for rust streaks, a damp drain pan, or a slow-dripping temperature and pressure relief valve. If you notice the meter spinning and hot water usage patterns suggest constant flow, suspect a hot-side leak. If failed components are part of the problem, consider Water Heater Repair – El Dorado Hills, CA Plumber or Anode Rod Replacement Water Heater – El Dorado Hills, CA Plumber for targeted help.
Next, separate supply from drain issues. Supply leaks occur regardless of fixture use; drain leaks show only when water is moving through them. Try this: fill a sink or tub to the overflow and let it stand for ten minutes. Watch the meter—if it remains still, pull the stopper and drain while watching below. Dampness that appears only while draining points to traps, tailpieces, or downstream drain lines. If dampness grows during the ten-minute hold, focus on overflow fittings or nearby supply lines.
Use shutoff valves to narrow zones, a process known as valve isolation. Close the cold supply to a bathroom group and check the meter. If the indicator stops, you’ve narrowed the leak to that zone. Reopen the cold and close the hot, then compare. Repeat for other fixture groups. With patience, this sequence points you toward a specific room, branch, or fixture without cutting into walls prematurely.
5. Hidden and Hard-to-Reach Leaks: Walls, Ceilings, Slabs, and Crawlspaces
Hidden leaks demand careful observation. Stains with crisp edges often indicate older, dried incidents; soft-edged, spreading stains typically point to active moisture. Musty odors come from damp materials with limited airflow. Warped trim and bubbling paint frequently result from water wicking up from lower areas. Use your moisture meter to map dampness and mark the wettest zones. That spot isn’t always the source, but it helps guide the first exploratory opening if one becomes necessary.
Temperature can reveal routing. Run only hot water at a nearby fixture for three minutes, then scan adjacent surfaces. A faintly warmer lane can trace a hot line. On ceilings, note joist direction—water travels along framing and may drip far from the true source. Check directly above the stain and in the next joist bay as well. Slow, systematic checks keep exploratory cuts minimal.
Slab and main-line problems have unique signals. A consistently warm tile patch under bare feet often means a hot-water line leak beneath the slab. If the meter runs even after you have closed interior valves during testing, the service line between the meter and the house may be compromised. Walk the yard along the service route, watching for softened soil or a steady trickle at the curb. In crawlspaces, scan for droplets at insulation tips, pooled water on vapor barriers, and mineral crust at copper joints.
If evidence suggests a buried or slab leak, engage a licensed plumber. Acoustic listening, thermal scanning, and tracer gas testing help pinpoint the fault through concrete or under finished floors, minimizing the repair footprint and preserving finishes whenever possible.
6. Found It—Now What? Mitigation, Drying, and When to Call a Pro
Once you’ve located the likely source, act to limit loss. Shut the nearest fixture valve or the main. For tiny pinholes in copper, a temporary pipe repair clamp or appropriate epoxy can hold while you plan a permanent fix. Wrap towels around active drips and replace them often. Move belongings off damp flooring. Use fans and open windows to speed evaporation, and keep indoor humidity down to discourage mold. Document the area with photos and brief notes; organized records help with claims and repair planning.
If drywall is wet, cut small inspection holes near the base to release trapped water. De-energize any affected outlets at the breaker. Avoid running central air or heating if ducts, returns, or blower compartments are wet. For standing water, a wet/dry vacuum can help. If carpet pads remain damp or develop odor, plan removal. In the first day, fast mitigation steps make the biggest difference in drying outcomes.
Call a licensed plumber if a leak is inside a wall or ceiling, under a slab, near electrical systems, or if shutoff valves will not hold. Comprehensive plumber leak repair covers tracing, safe access, fix, and verification testing. Ask about the repair approach, materials, and expected schedule. Costs vary depending on access difficulty, materials, and the extent of related damage. If your water heater is implicated, consider Water Heater Installation – El Dorado Hills, CA Plumber or Water Heater Repair – El Dorado Hills, CA Plumber. For aging supply lines, a plumber may recommend upgrades or water softener installation to protect piping and fixtures over time.
If a pipe bursts suddenly, shut the main immediately and open faucets from lowest to highest to drain lines and reduce pressure. This helps limit spray and collateral damage. Emergency Burst Pipe Repair and Leaks & Burst Pipes – El Dorado Hills, CA Plumber address urgent failures with the right methods and post-repair testing to ensure the system holds.
7. Prevent the Next Leak: Maintenance, Pressure Control, and Smart Monitoring
Prevention comes from steady, simple habits. Check under sinks monthly for dampness and for green/white crust on brass or copper fittings. Replace brittle or bulging supply lines with braided stainless lines. Keep toilet flappers and fill valves in good shape so silent run-on doesn’t waste water. Flush the water heater annually per the manufacturer’s guidance to reduce sediment stress; when the anode rod is depleted, schedule Anode Rod Replacement Water Heater – El Dorado Hills, CA Plumber to help protect the tank. In El Dorado Hills, where temperature swings and hard water can stress valves, staying ahead of wear is especially helpful.
Manage water pressure. Excessive pressure strains joints and valves. A pressure reducing valve (PRV) helps maintain household pressure in a safe range, commonly around 50–60 psi. A simple gauge at a hose bib will show you where you stand; if it reads high, a licensed plumber can adjust or replace the PRV. Consider water softener installation if mineral scale accumulates on fixtures and valves—scale can restrict flow and stress components over time.
Use smart tools for early warning. Place smart leak detectors under sinks, beside the water heater, and behind the washer. Some systems integrate with automatic shutoff valves that close the main when a sensor trips. Watch your monthly water bill for unexplained increases—steady rises without new usage patterns often hint at a hidden problem. Keep a simple log of meter readings during quiet periods; over time, patterns reveal issues early, before damage expands.
El Dorado Hills Plumbing is in the field across El Dorado Hills every week helping homeowners and businesses track down tricky leaks quickly. Whether it’s a slow toilet fill, a subtle slab leak, or a sudden failure in a crawlspace, trained technicians methodically isolate the cause and complete repairs with care.
Frequently Asked Questions
How do I tell if my toilet is leaking into the bowl?
Add dye to the tank and wait ten minutes without flushing. If color appears in the bowl, the flapper isn’t sealing. Also listen for a faint hiss or periodic refilling. Replacing the flapper and cleaning the seat surface usually solves it.
What should I do first when a pipe bursts?
Shut off the main immediately. Open cold faucets from low to high to drain lines and reduce pressure. Turn off power to any wet area. Move items out of harm’s way. Use towels and a wet/dry vacuum to contain spread. Then call a licensed plumber to repair and test the system.
Who installs hot water heaters and handles permits?
A licensed plumber installs water heaters and manages code and safety requirements. They size the unit, connect venting and gas or electric correctly, and test for tightness. If replacing an older unit, ask about Water Heater Installation – El Dorado Hills, CA Plumber and any code updates needed in El Dorado Hills and California.
How do I fix a small leaking pipe joint myself?
Shut water off, dry the joint, and apply a temporary pipe repair clamp or a plumbing-grade epoxy. Treat these as short-term measures to limit damage; plan a permanent repair by replacing the failed section with a licensed plumber.
How often should I check the anode rod in a water heater?
Follow the manufacturer’s guidance. Many owners plan an early inspection a few years after installation, then as conditions warrant. If water is hard or hot water develops a sulfur-like odor, ask about Anode Rod Replacement Water Heater – El Dorado Hills, CA Plumber.
Key takeaways
- Confirm fast with a meter test when all water is off.
- Protect safety first: shut water and power to wet zones before inspecting.
- Isolate zones systematically using valves and timed drain tests.
- Call a licensed plumber for concealed, slab, or service-line leaks.
- Prevent recurrence with proper pressure control and smart leak sensors.
Conclusion
Finding a leak is a methodical process, not a guessing game. Start with the meter, work through the easiest checks, and use valve isolation to zero in on the right branch or fixture while you protect finishes and electrical safety. El Dorado Hills Plumbing helps property owners with leak detection, targeted pipe repairs, and water-damage mitigation. Contact us.
If you are not sure which of these you are dealing with, it is worth having someone look at it before it turns into a bigger job. Get in touch with El Dorado Hills Plumbing today and we will tell you where you stand.